
In This Article
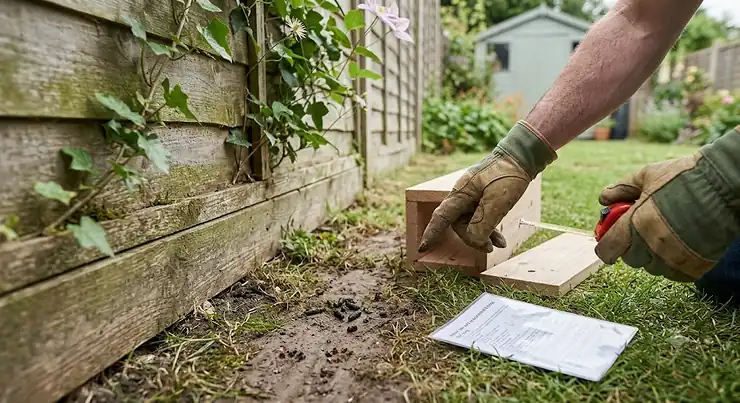
A tunnel rat trap is a covered, two-entry rodent trap that shields a snap or kill mechanism inside a plastic sleeve, letting rats enter from either direction while keeping fingers, paws and curious noses well away from the business end. If you’ve ever watched a rat vanish under next door’s fence panel the second it clocks you, you’ll already understand why the tunnel design exists — rats are cautious, edge-loving animals, and a bare snap trap sitting in the open is about as inviting to them as a spotlight. Knowing how to set a tunnel rat trap properly is the difference between a quiet, effective clear-out and weeks of untouched bait going soggy in the rain.
This guide walks through genuine spec comparisons, real aggregated review sentiment, and honest buying advice for seven traps currently sold on Amazon UK, spanning budget bait boxes through to professional-grade stations. We’ll cover exact placement logic, bait tricks that pest professionals swear by, and the legal bits most product listings conveniently skip. According to GOV.UK, you can be fined or imprisoned if you cause unnecessary harm to any animal while dealing with pests on your property, so getting the setup right isn’t just about catch rates — it’s about doing this properly. You can read the government’s full guidance on pest control on your property here.
Quick Comparison Table
| Trap | Type | Best For | Price Range |
|---|---|---|---|
| Rat Reaper | Dual-entry tunnel, snap kill | Fences and garden runs | around £20-£25 |
| Mastertrap Bait Station Tunnel | Lockable tunnel box, holds 2 snap traps | Households with pets/kids | £15-£20 range |
| Pest X Pro Shadow | Commercial-grade tunnel station | Persistent infestations | £25-£35 range |
| ROSHIELD Electric Trap | Electronic tunnel, instant kill | Indoor loft/garage use | £30-£45 range |
| Ratkil Ultra Powerful Rat Trap | Heavy-duty covered snap | Large sewer/garden rats | under £20 |
| Pest-X Pro Lightning (4 Pack) | Budget covered snap, multipack | Multiple simultaneous sites | £20-£30 range |
| BATUUTAH Heavy Duty (4 Pack) | Large covered snap, multipack | Sheds and outbuildings | under £25 |
Even at a glance, you can see the split forming: some traps are built to be a permanent fixture bolted to a fence line, while others are cheap enough to scatter four or five around a garden without thinking twice. Price alone won’t tell you which one clears an infestation faster — a £15 tunnel with a weak spring can sit untouched for a fortnight while a well-placed £25 unit finishes the job in three nights. What actually separates them, as we’ll get into below, comes down to spring tension, tunnel length, and whether the thing survives a fortnight of proper British drizzle.
💬 Found a trap here that matches your garden? Tap through and check today’s price before stock runs low.
Top 7 Tunnel Rat Traps: Expert Analysis
1. Rat Reaper — dual-entry tunnel with bait already included
The Rat Reaper ships with peanut butter bait sachets, which sounds like a gimmick until you realise peanut butter is genuinely the bait pest controllers reach for first, because its strong, oily scent travels further than dry pellets or cheese ever will. Specs-wise, it’s a plastic tunnel roughly 25cm long with a concealed snap mechanism triggered by a foot-or-hand-set lever, and the tunnel is wide enough to accommodate a full-grown brown rat rather than just juveniles. What most buyers overlook about this model is that the tunnel shape isn’t just a safety cover — it exploits the rat’s habit of hugging walls and edges, so placement against a fence or skirting board does most of the work for you. Reviewers consistently report strong catch rates when the trap is pre-baited without setting the trigger for a couple of days first, letting the rat get comfortable before it’s live; several buyers also mention it holding up fine outdoors through wet weeks, though a handful flagged that the snap doesn’t always deliver an instant kill on larger animals if positioning is off. Based on the spec comparison with pricier stations, this is the strongest all-rounder for a typical semi-detached garden with a moderate rat presence rather than a full infestation.
Pros:
- ✅ Bait sachets included, ready to use immediately
- ✅ Dual entry works with rat runs from either direction
- ✅ Enclosed design keeps pets and children away from the mechanism
Cons:
- ❌ Snap strength can be inconsistent on very large rats
- ❌ Tunnel plastic shows wear after prolonged sun exposure
At around £20-£25 for a two-pack, the Rat Reaper sits comfortably in the mid-budget bracket, and given that the bait is included, the real cost per catch works out lower than it first appears.
2. Mastertrap Bait Station Tunnel — lockable box built for households with pets
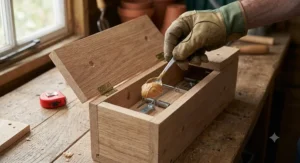
The Mastertrap Bait Station Tunnel takes a different approach: rather than a soft plastic sleeve, it’s a rigid, key-lockable box that holds two full-size snap traps inside, with dual entry points on either end. The lock isn’t decorative — it means a curious dog can headbutt the box all day without ever springing the mechanism inside, which matters enormously if you’re setting traps in a garden that doubles as a play area. On paper, running two traps inside one station roughly doubles your chances of a first-night catch compared with a single-tunnel trap, since a rat exploring from either direction meets a live trigger regardless of which way it enters. Aggregated review sentiment is largely positive here, with several buyers specifically praising how easy the box is to empty — unlock, tip the trap into a bin bag, relock — without any need to touch the animal directly, and one recurring theme in the reviews is that owners feel confident using it around family pets. The main gripe raised by buyers relates to airflow: some birds have reportedly triggered the outer traps when investigating the entrance holes, so this is one to monitor if you get regular garden bird visits.
Pros:
- ✅ Lockable box design, genuinely pet and child safe
- ✅ Holds two traps for a higher first-night catch rate
- ✅ Simple to empty without handling the trap or rat
Cons:
- ❌ Bulkier than single-tunnel traps, less discreet
- ❌ Occasional non-target catches reported by some birds
Priced in the £15-£20 range, this is one of the more affordable lockable options on Amazon UK, and the value case is strong if pet safety is your top priority.
3. Pest X Pro Shadow — commercial-grade tunnel for persistent infestations
If you’ve ever seen a professional pest controller’s kit, there’s a decent chance the Pest X Pro Shadow was in it. The build quality is the standout feature here: thicker, reinforced plastic walls, angled entry tunnels sized specifically to encourage rat entry while discouraging non-target species, and a completely concealed internal mechanism. What that heavier construction buys you in practice is consistency — thinner consumer stations tend to flex and degrade after repeated triggering, whereas this one is designed to perform “catch after catch, week after week” without the housing cracking. The dual-entry tunnel design means you can position it flush along a wall or fence run without worrying about which direction the rat is travelling, which matters because rats rarely reverse a route they’ve already learned is safe. Where this model earns its premium price is on infestations that have been running for weeks rather than days; a single lightweight trap gets overwhelmed quickly if there are multiple rats using the same run, but the reinforced Shadow can be reset and rebaited repeatedly without the housing loosening. The trade-off, unsurprisingly, is cost and bulk — it’s a noticeably bigger unit than the budget tunnels on this list.
Pros:
- ✅ Commercial-grade build, holds up to repeated use
- ✅ Tunnel entries angled to reduce non-target catches
- ✅ Handles ongoing infestations rather than one-off catches
Cons:
- ❌ Higher price point than consumer-grade tunnels
- ❌ Larger footprint, less discreet in tight spaces
Expect to pay in the £25-£35 range, which reflects the step up in materials — for a genuinely persistent problem, this is where the value argument tips in the Shadow’s favour.
4. ROSHIELD Electric Rat & Mouse Trap — instant-kill tunnel for indoor use
The ROSHIELD Electric Rat & Mouse Trap swaps the mechanical snap for a high-voltage electric plate inside a covered tunnel, delivering what the manufacturer and multiple reviewers describe as an instant kill with no blood, mess or reset fiddling. In practice, this means the rat enters the tunnel chasing the bait, completes the circuit, and the unit is done — no re-cocking a spring by hand, no risk of a weak strike leaving an animal injured rather than killed. This matters from a welfare standpoint too, since organisations including the RSPCA have specifically flagged that poorly performing mechanical traps are more likely to injure rather than kill outright. Reviewers consistently note that battery life is the main practical consideration; most units run for weeks between charges depending on how many rats pass through, and the trap typically includes a status light so you’re not opening it blind. Because it needs batteries and is less weatherproof than a fully sealed mechanical box, this one is best reserved for lofts, garages and sheds rather than an exposed garden fence line in December.
Pros:
- ✅ Instant, humane kill with no manual resetting needed
- ✅ No blood or mess, easy to empty and reuse
- ✅ Status indicator shows when a catch has occurred
Cons:
- ❌ Requires batteries, less suited to constant outdoor exposure
- ❌ Higher upfront cost than mechanical tunnel traps
Sitting in the £30-£45 range, the ROSHIELD Electric Rat & Mouse Trap is the premium pick here, and the value case rests on how much you weigh the hands-off, mess-free reset over the higher initial outlay.
5. Ratkil Ultra Powerful Rat Trap — heavy-duty covered snap for large rats
The Ratkil Ultra Powerful Rat Trap is built around a straightforward premise: a lot of budget traps are actually sized for mice and simply relabelled, so an infestation of genuinely large brown rats overwhelms them mechanically before they even trigger properly. This model uses a reinforced spring and a covered two-entrance tunnel specifically scaled for adult rats, which the manufacturer states kills cleanly without breaking the skin — a detail that also means less mess and no lingering odour to deter the next rat. The tunnel shape does double duty here, both protecting bystanders and exploiting the fact that a rat can’t turn around fast enough once it’s committed to the tunnel, so escape after triggering the plate is essentially impossible. Reviewers frequently describe reusing the same trap across multiple seasons without any drop in spring tension, which is a meaningful cost consideration if you’re dealing with a recurring seasonal problem rather than a single clear-out. Where this trap makes most sense is any site — allotments, stables, farm outbuildings — where you know from droppings or gnaw marks that you’re dealing with fully grown rats rather than juveniles or mice.
Pros:
- ✅ Reinforced spring built specifically for adult rats
- ✅ Clean kill with minimal mess or lingering odour
- ✅ Reusable across multiple seasons without losing tension
Cons:
- ❌ Overkill and less humane if only mice are present
- ❌ Stronger spring makes manual setting trickier for some users
At under £20, this is one of the more affordable heavy-duty options, making it a sensible choice if you need several units without blowing the budget.

6. Pest-X Pro Lightning (4 Pack) — budget multipack for covering several sites at once
Where the Pest-X Pro Lightning four-pack earns its keep is coverage. A single trap, however good, can only watch one entry point — but rats rarely use just one route into a garden, and a proper clear-out usually means blocking off multiple runs simultaneously along a fence line, a shed base and a compost area all at once. Each unit in the pack is a heavy-duty covered snap trap that the brand markets as killing “in a flash,” and buying four at once works out considerably cheaper per trap than purchasing single premium units individually. Reviewers who’ve bought multiples specifically for wider garden coverage tend to report the fastest overall clear-out times in this whole roundup, not because any individual trap outperforms the others on this list, but because more simultaneous coverage statistically increases the odds a rat encounters a live trap on any given night. The trade-off is build quality: these are noticeably lighter-duty than the Pest X Pro Shadow or Ratkil, and a handful of reviewers note the housing shows wear faster under constant rain exposure.
Pros:
- ✅ Four traps per pack, ideal for covering multiple runs
- ✅ Lower cost per unit than premium single traps
- ✅ Quick-kill mechanism, straightforward to set
Cons:
- ❌ Lighter-duty housing than premium single stations
- ❌ Less weather-resistant over extended outdoor use
Priced in the £20-£30 range for the full pack, the value here is in the multiplier — four traps working a garden simultaneously beats one premium trap sat in a single spot.
7. BATUUTAH Heavy Duty (4 Pack) — large-format traps for sheds and outbuildings
The BATUUTAH Heavy Duty pack features a 14cm covered snap design, noticeably larger than most mouse-oriented traps sold alongside them on Amazon, and specifically marketed at pest control for outdoor rodents rather than indoor mice. That extra size matters more than it might seem: a treadle plate scaled for a mouse simply won’t trigger reliably under the lighter footfall pattern of some rats, whereas a properly sized adult-rat trap resolves that mismatch entirely. Buyers commonly place these around shed bases, garage corners and outbuilding perimeters — anywhere rats are known to nest rather than just pass through — and the reusable, easy-set design means no specialist tools are needed to reload after a catch. Aggregated review sentiment is generally strong on effectiveness, though as with several budget multipacks on this list, a minority of buyers report the spring weakening after heavy repeated use across a full season, so treating these as a one-to-two-season product rather than a lifetime purchase is the honest expectation to set.
Pros:
- ✅ Sized specifically for adult rats, not repurposed mouse traps
- ✅ Four-pack covers sheds, garages and outbuildings at once
- ✅ Reusable and easy to reset after each catch
Cons:
- ❌ Spring tension can weaken after a full season of use
- ❌ Bulkier housing, less suited to tight indoor spaces
At under £25 for the pack, this is one of the most budget-friendly ways to cover an outbuilding perimeter with properly sized traps.
Top 7 Products: Specs & Value at a Glance
| Trap | Kill Method | Weatherproof | Price Range | Best For |
|---|---|---|---|---|
| Rat Reaper | Mechanical snap | Moderate | £20-£25 | Fence and wall runs |
| Mastertrap Bait Station Tunnel | Mechanical snap, dual | Good | £15-£20 | Homes with pets/kids |
| Pest X Pro Shadow | Mechanical snap | Excellent | £25-£35 | Ongoing infestations |
| ROSHIELD Electric Trap | Electric shock | Poor-Moderate | £30-£45 | Indoor lofts/garages |
| Ratkil Ultra Powerful Rat Trap | Mechanical snap | Good | under £20 | Large adult rats |
| Pest-X Pro Lightning (4 Pack) | Mechanical snap | Moderate | £20-£30 | Multi-site coverage |
| BATUUTAH Heavy Duty (4 Pack) | Mechanical snap | Good | under £25 | Sheds and outbuildings |
Read across this table and a pattern emerges: weatherproofing and price track together fairly closely, with the fully enclosed, reinforced boxes commanding a premium over the lighter multipacks. If your rat problem is genuinely outdoors and exposed to the elements — a fence line, a compost heap, an allotment boundary — the Pest X Pro Shadow or Mastertrap Bait Station Tunnel will outlast a budget multipack across a wet British winter. For anyone tackling several access points at once on a tighter budget, though, four lighter traps from the Pest-X Pro Lightning pack covering four separate runs will likely out-catch one premium trap covering just one.
✨ Don’t Miss These Exclusive Deals!
🔍 Take your rat control setup to the next level with the traps above. Click through to check current pricing and availability before you commit — stock and prices shift quickly on popular pest control lines.
Practical Usage Guide: How to Set a Tunnel Rat Trap Step by Step
Getting the mechanics right matters as much as picking the right trap. Start by identifying an active rat run rather than guessing — look for greasy smear marks along skirting boards or fence bases, footprints in dust, or a visibly worn path through grass, since rats reuse the same routes night after night. Next, place the trap unset and unbaited for two to three days first; a brand-new object dropped into a rat’s route will be treated with suspicion, and pre-positioning lets the scent settle and the rat’s caution fade before anything is live. When you do bait it, use a small amount pushed to the back of the tunnel rather than piled at the entrance, forcing the rat fully inside before it reaches the trigger plate. Always wear gloves when handling the trap or bait, since human scent can put a wary rat off entirely, and set the trap on a firm, level surface — a wobbly base is one of the most common reasons a trigger plate fails to level and fire correctly. Once set, check every trap daily; not only is this the responsible, humane approach, but a full trap left unchecked stops working for you and starts smelling, which will actively repel any remaining rats from that spot.
In the first month, the most common mistake is impatience — resetting a trap after two quiet nights and moving it somewhere new, when the actual issue was simply that the rat hadn’t yet built confidence in the route. Give a well-placed trap at least a week before relocating it, and resist the urge to overload the tunnel with bait; too much bait lets a clever rat nibble from the edges without ever triggering the plate.
Real-World Scenarios: Matching the Right Trap to Your Situation
Picture a young family in a Manchester terrace with a toddler and a spaniel who won’t stop sniffing the same corner of the garden. Here, the enclosed, lockable Mastertrap Bait Station Tunnel is the obvious fit — the key-lock means neither dog nor child can access the mechanism, and the dual traps inside cover both directions of an active fence-line run without needing to relocate anything mid-week. Contrast that with a retired couple running a smallholding in rural Yorkshire, dealing with a persistent, multi-season infestation around a stable block; here, the reinforced Pest X Pro Shadow or the specifically large-format Ratkil Ultra Powerful Rat Trap make more sense, since both are built to survive being reset dozens of times across a wet winter without the housing failing. A third scenario: a student houseshare with a shared garden and a suspected single rat sighted once near the bins. Rather than investing heavily, four budget units from the Pest-X Pro Lightning pack spread across bin store, shed base and fence gap will likely resolve a single-rat sighting for a fraction of the cost of one premium station, simply through covering more ground.

Problem → Solution: Common Tunnel Rat Trap Mistakes Fixed
Problem: bait keeps disappearing but nothing is caught. This almost always means the bait is reachable from the tunnel entrance without the rat needing to cross the trigger plate — push bait further back and secure it firmly rather than leaving loose crumbs.
Problem: the trap hasn’t fired after a week. Check the surface underneath is completely flat and firm; a treadle-style trigger needs to level correctly, and even a slight tilt on soft garden soil can stop it firing.
Problem: catches stopped after an initial success. A single trap left in the same unwashed spot can start to smell of a dead rat, which deters others from approaching — relocate slightly and give the area a rinse.
Problem: non-target catches, like birds. Switch to a model with narrower, angled entry tunnels such as the Pest X Pro Shadow, and avoid siting traps directly under bird feeders or nesting areas.
Problem: rats seem to be avoiding the trap entirely. This is often down to human scent — always handle bait and traps with gloves, and pre-bait for several days before ever setting the mechanism live.
Best Placement for Tunnel Rat Trap Success
Placement genuinely matters more than the trap you buy, and it comes down to understanding how rats actually move. The most humane and effective approach is to position traps perpendicular to a wall with the capture end against it, or parallel to the wall if you know the rat’s direction of travel, using something like a large box to funnel the animal towards the trap. In practice, that means the tunnel’s closed side or the wall-facing entrance should sit flush against the fence, skirting board, or shed base — never in the open middle of a garden or room, since rats avoid exposed spaces almost entirely. Low light matters too: rats navigate largely by touch through their whiskers rather than sight, so shaded, low-traffic corners near known activity will always outperform a trap positioned somewhere convenient for you but irrelevant to the rat’s actual route. If you’re struggling to identify the best spot, look for the physical evidence first — smears, droppings, gnaw marks or a visibly compacted path through grass — because a perfectly placed trap on the wrong route will simply gather dust.
Rat Run Placement: Reading the Signs Rats Leave Behind
A rat run is the worn, repeated path a rat takes between its nest and its food source, and once established, it becomes remarkably consistent — the same gap in a fence, the same edge of a patio, night after night. Rat runs become apparent once the best route has been established, and in even a moderate infestation they’ll show as smears and droppings along the path. Spotting a run is genuinely the single most useful skill in this whole guide, because a trap placed directly on an active run will consistently outperform two or three traps scattered on guesswork. Look along fence bases, under decking, and around compost bins for a visibly flattened or discoloured strip; outdoors, this is often most obvious first thing in the morning, before dew has evaporated and while footprints are still crisp in damp soil. The British Pest Control Association has a detailed guide to identifying rat runs and other infestation signs here.
Tunnel Trap Bait Tips That Actually Work
Peanut butter is the single most reliable bait for UK rats, and it isn’t close — its strong, oily scent carries much further than dry alternatives, and rats find the sticky texture harder to remove from a trigger plate without setting it off, which pushes catch rates up compared with looser baits like seed or dry pet food. Chocolate and raisins are solid runners-up, particularly for rats that have grown wary of anything smelling unfamiliar, since a rotating bait strategy can help overcome bait shyness in a persistent population. Whatever you choose, use a small, firmly pressed amount rather than a generous scoop — a rat that can nibble from the edge without triggering the plate has effectively been fed for free, and a wasted bait visit also adds more of your scent to the area. Pre-baiting without setting the trigger for two to three days is the most consistently recommended trick across every source we reviewed, letting a naturally cautious rat build familiarity with the tunnel before the mechanism goes live.
Rat Tunnel Trap Garden Setup: Weatherproofing and Outdoor Positioning
A garden is a fundamentally harder environment for a trap than an indoor loft or shed, because British weather doesn’t take days off. If you’re setting a rat tunnel trap garden-wide across multiple beds, borders or a fence line, prioritise models with genuinely sealed housings — the Pest X Pro Shadow and Mastertrap Bait Station Tunnel both use thicker, weather-resistant plastic that resists warping, whereas lighter budget multipacks can become brittle after repeated wet-dry cycles. Position traps under natural cover where possible — beneath a hedge overhang, tucked against a shed base, or under decking — both to protect the mechanism from direct rain and because rats themselves strongly favour covered routes over exposed open ground. Raise the tunnel slightly off waterlogged soil if your garden holds standing water after rain, since a flooded trigger plate simply won’t fire, and check traps more frequently during wet spells, since damp bait degrades and loses its scent-carrying power faster than it does in dry weather.
Rat Trap Near Fence: Boundary Placement Explained
Fence lines are, statistically, the single best place to position a tunnel rat trap in most UK gardens, and there’s a straightforward reason why: rats travel along fixed boundaries because the fence itself provides both cover and a consistent physical guide for their whiskers in low light. A runway may be obvious at a fence line where rats move from one household to another, appearing as smooth, compacted soil or grass along the boundary. When setting a rat trap near fence panels specifically, position the tunnel so its length runs parallel to the fence rather than perpendicular, with the entrance closest to any visible gap, gnaw mark or burrow entrance. It’s also worth having a quiet word with neighbours if you spot fence-line activity, since a rat run rarely respects a single garden boundary — coordinated trapping either side of a shared fence tends to clear an area considerably faster than one household tackling it alone. Reading Borough Council’s rat prevention guide covers fence-line signs and boundary coordination in more detail.
Rodent Trap Positioning for Different Property Types
Rodent trap positioning isn’t one-size-fits-all, and the right approach genuinely shifts depending on what kind of property you’re dealing with. In a terraced house, focus on shared boundary walls, alley access points, and bin storage areas, since these are the highest-traffic zones in dense housing. In a detached property with a larger garden, compost heaps, shed bases, and any overgrown borders become the priority, as these offer both food and cover. Flats and maisonettes present a different challenge entirely — rats here typically travel via drains, cavity walls or communal bin areas, so positioning tends to matter less than coordinating with a managing agent or neighbours to treat the source rather than a single flat in isolation. Rural properties and smallholdings should prioritise outbuildings, feed stores and stable blocks, where large-format traps like the Ratkil Ultra Powerful Rat Trap are better suited to the scale of rat typically present than a domestic garden model.
Tunnel Rat Traps vs Open Snap Traps vs Bait Stations
| Feature | Tunnel Trap | Open Snap Trap | Poison Bait Station |
|---|---|---|---|
| Pet/child safety | High | Low | Moderate |
| Setup difficulty | Moderate | Low | Low |
| Speed of results | Fast | Fast | Slow (days) |
| Weather resistance | Good-Excellent | Poor | Good |
| Best For | Gardens, fences, sheds | Enclosed, inaccessible spots | Persistent large infestations |
The safety gap between tunnel traps and open snap traps is the single biggest reason most UK households have moved away from the latter — an open trap powerful enough to kill a rat instantly will also break a finger or injure a pet’s nose, whereas a covered tunnel design removes that risk almost entirely while keeping the same kill mechanism. Poison bait stations remain more effective for genuinely large, established infestations, but they work over days rather than a single night, and carry real secondary poisoning risks to pets and wildlife that eat an affected rodent. For the average homeowner dealing with a handful of rats around a garden or shed, a tunnel trap strikes the best balance of speed, safety and effectiveness without introducing rodenticide into an environment with children, pets or garden birds.
How to Choose a Tunnel Rat Trap
- Confirm you’re dealing with rats, not mice. Droppings over 12mm and gnaw marks in tougher materials point to rats; a trap sized for mice will underperform or fail to trigger on an adult rat.
- Match the trap to your environment. Fully enclosed, weather-resistant housings for outdoor fence lines and gardens; lighter mechanical or electric traps for indoor lofts and garages.
- Check pet and child safety features. A lockable box like the Mastertrap Bait Station Tunnel is worth the extra setup step if you have curious pets or young children.
- Consider the scale of the problem. A single premium trap suits a minor sighting; multiple budget units, like the Pest-X Pro Lightning pack, suit multiple simultaneous access points.
- Factor in reusability. Mechanical spring traps generally offer the lowest long-term cost per catch if the spring tension holds up over repeated use.
- Check the tunnel width. A tunnel too narrow for a fully grown brown rat will reduce catch rates significantly, regardless of the trigger mechanism’s quality.
- Read genuine buyer feedback before committing. Aggregated review sentiment around reliability and weather resistance is often more revealing than the listed specs alone.
Long-Term Cost & Maintenance
A single reusable tunnel trap typically costs less over two or three seasons than a rolling subscription to poison bait refills, since mechanical traps like the Ratkil Ultra Powerful Rat Trap and Pest X Pro Shadow need nothing beyond occasional bait and the odd rinse to keep performing. Electric traps such as the ROSHIELD Electric Rat & Mouse Trap carry a higher upfront cost and an ongoing (if modest) battery expense, but save time by removing the need to manually reset a spring after every catch, which matters if you’re managing several units across a larger property. Budget multipacks tend to have the shortest genuinely useful lifespan, with several reviewers across this roundup reporting weakened springs after a full season of heavy use — worth factoring in if you’re comparing four cheap traps against one premium station on a strict per-catch cost basis rather than just the sticker price.
Safety, Regulations & Compliance Guide
UK law on rodent control has shifted meaningfully in recent years, and it’s worth knowing the current position before you set anything up. Since 2024 it has become illegal for members of the public in England to use glue traps, with professional pest controllers only permitted to use them under special licensed circumstances — none of the traps featured in this guide are glue traps, but it’s a relevant point if you’ve seen them sold alongside snap and tunnel traps online. More broadly, under UK law you must protect other animals from traps or poison by placing lethal traps under cover or in a way that prevents other animals and birds being caught, and you can be fined or imprisoned for causing unnecessary harm to any animal — which is precisely why the covered, tunnel-entry design featured throughout this guide exists in the first place. Landowners also carry a legal duty here: under the Prevention of Damage by Pests Act 1949, occupiers are required to keep their land reasonably free of rats, so persistent infestations that go unaddressed can, in principle, become a council enforcement matter. If a DIY approach with the traps above isn’t shifting a genuinely large infestation within a couple of weeks, it’s worth calling in a British Pest Control Association-accredited professional rather than escalating to poison without proper guidance. RSPCA’s full advice on humane rodent deterrents and current UK trap regulations is available here.

FAQ
❓ How do you set a tunnel rat trap for the first time?
❓ Where is the best placement for a tunnel rat trap?
❓ What is the best bait for a tunnel rat trap?
❓ How often should you check a tunnel rat trap?
❓ Are tunnel rat traps safe for pets and gardens?
Conclusion
Setting a tunnel rat trap properly comes down to three things that matter far more than which specific product you buy: correct placement on an active run, patient pre-baiting before the trigger goes live, and daily checking once it’s set. Of the seven traps covered here, the Mastertrap Bait Station Tunnel and Rat Reaper offer the strongest all-round starting point for most UK gardens, the Pest X Pro Shadow and Ratkil Ultra Powerful Rat Trap earn their higher price for persistent or large-scale problems, and the Pest-X Pro Lightning and BATUUTAH Heavy Duty packs make sense when covering several access points matters more than any single trap’s build quality. The ROSHIELD Electric Rat & Mouse Trap rounds things out as the cleanest indoor option if mess and manual resetting are your main concerns. Whichever you choose, the placement and patience principles above will do more for your catch rate than the trap itself — a well-positioned budget trap will consistently outperform a premium one sat in the wrong spot.
✨ Ready to Sort Your Rat Problem?
🔍 Browse the traps above and check current pricing on Amazon before you commit — availability on popular pest control lines shifts fast, especially heading into autumn.
Recommended for You
- Best Tunnel Rat Trap 2026: 7 Tested Picks That Actually Work
- Do Electric Rat Traps Work? 7 Tested Picks for 2026
- Best Electric Rat Trap 2026: 7 Top Picks Tested & Compared
Disclaimer: This article contains affiliate links. As an Amazon Associate, I earn from qualifying purchases. If you purchase products through these links, we may earn a small commission at no additional cost to you.
✨ Found this helpful? Share it with your friends! 💬🤗
